Make Your Own Gift Box
- Shan Wright

- Jul 11, 2017
- 4 min read

Hey there!
Remember that I told you about my love for paper pads? And, remember that I told you there are soooo many things you can do with the paper in those pads? Well today I'm going to show you one of my favorite things to do with them!
Boxes. Yep, boxes. I know that you can go and pick up a box at the store but how fantastic is it to know that you can make a box that looks just as good, if not better than the ones in the store? And, won't your friends love it when they see that you not only made or handpicked their gift but you also crafted the box that their gift is in? You feel special, they feel special, we all feel special good people!

The standard size for paper pads is 12 X 12 (that is not a scientific fact. I think it's true so...). A 12 X 12 piece of paper makes a 6" X 3 1/4" X 2 1/2" sized box. A pad of 12 X 12 papers? Well that makes a lot of boxes!

All I did was pull some pretty sheets of paper from my Salvage District paper pad from Prima. I liked the grey tones and figured all of the boxes would look super fancy.

Disclaimer. I know that many of you don't have a scoring board. You don't have to have one. I'm going to give instruction using one because it's the easiest and fastest way to create boxes at first. Spoiler alert -- come back in a few days and see what you can do without a scoring board.

After you choose a pretty piece of paper for your box, score one side of the paper at 3" and 9" (shown in orange).

Next, rotate the paper and score at 1", 3 1/2", 6 1/2" and 9" (shown in black).

Make sure you use your bone folder (or ruler) to make sure your creases are strong.

Make sure your 3" and 9" side (orange line) are vertical. You should be able to visualize a box cover and flap. Do you see the no cut zone? Well, once we start cutting you will cut through Box area 1, 2 and 3 but not through the next set of boxes.
You will cut along the 3" line and the 9" line. You will remove the boxes from Box area 1 and 2 but NOT Box area 3.

Cut the Box area 1 and 2 on both the left and right side. Don't throw away your scraps. You can use these for other things (I haven't figured out what yet but be patient).

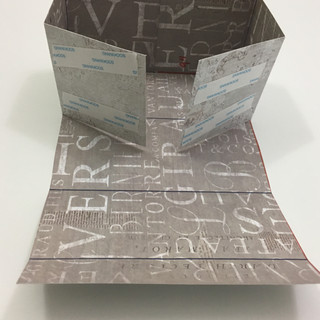
Head toward the bottom of your paper and cut up one box. You still need to maintain your no cut zone. You will never cut the no cut zone!
Now you see it! Now the box shape comes together and you can begin to pat yourself on the back. You almost don't need my direction anymore!

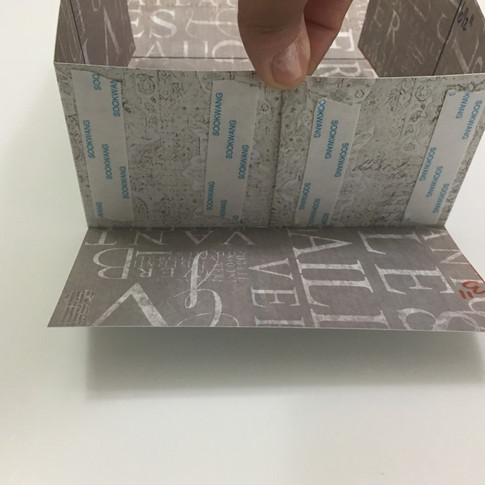
You know that my adhesive of choice is double sided tape. You can use wet glue if you'd like. That would help by giving you time to maneuver the parts into place. I like my double sided tape. I just make sure I move slowly and carefully.
I added two strips of tape to both sides of my paper. When you get ready to tape, I advise doing one side at a time. You want to make sure you get the parts in the proper place because double sided tape is not forgiving.
Now, the back of the box is different. You add your double sided tape and put both of the sides together at the same time. You'll see how much easier it is to put them both together when you create your box.
I clip my edges of the to fold for aesthetics and well, it closes better. I then add a fastener dot. I always have some on hand from the Dollar Tree. They aren't super sticky which works very well in this case. You don't want a super sticky hold.

Decorations anybody? Of course you want decorations. You can have a plain box but why? Ribbon, gems, butterflies, you name it, it goes on the box.

I mean really, wouldn't you love getting a gift in a cute box like this? It's not one of those super sturdy boxes so you can't put a candle in this or anything but an elegant necklace or something like that would be perfect.

I know, I know. All these steps sound difficult but I promise it's not. I made all these boxes in about 10 minutes. The first box (the plain one on top) was the hardest one. After that, I zipped through them.
Remember I said that it's easy to make this when you use your scoring board? Well come back Thursday and see how you can make this without a scoring board!


Comments